Table of Contents
Get our free local reporting delivered straight to your inbox. No noise, no spam — just clear, independent coverage of Marblehead. Sign up for our once-a-week newsletter.
So many choices and so many methods for starting seeds indoors. If you are alright with a little dirt in your house, here is what works for me. What I love about starting seeds in February is simply that I am hopeful something will grow. Something always grows.
The main reason for starting seeds, besides the hope it brings, is that you are given so many choices of varieties which you will never see at the grocery store. You can choose and grow whatever tomato or cucumber or flower your heart desires. So let's get started. Here is what you need: soil, seeds, and a light source.
- Soil Matters - avoid the inferior bagged soil at big box stores which has the texture of sawdust. Go over to Marblehead garden center and get Coast of Maine Seed Starter (See link)! (https://amzn.to/4r375A9).
- Seeds - loads to choose from at the garden center and many great online sources. I have had great success with ParkSeeds.com. I always get my tomato and cucumber seeds from there. Their Wave petunias have always been successful for me. I even collect the seeds from plants and resow them the following year.
When browsing for seeds, read the instructions on the back. Some "native" seeds often require an extra step called cold stratification. This just means put them in your fridge for 2 weeks. Some seeds require light, others require dark. Knowing this information will greatly improve your success.
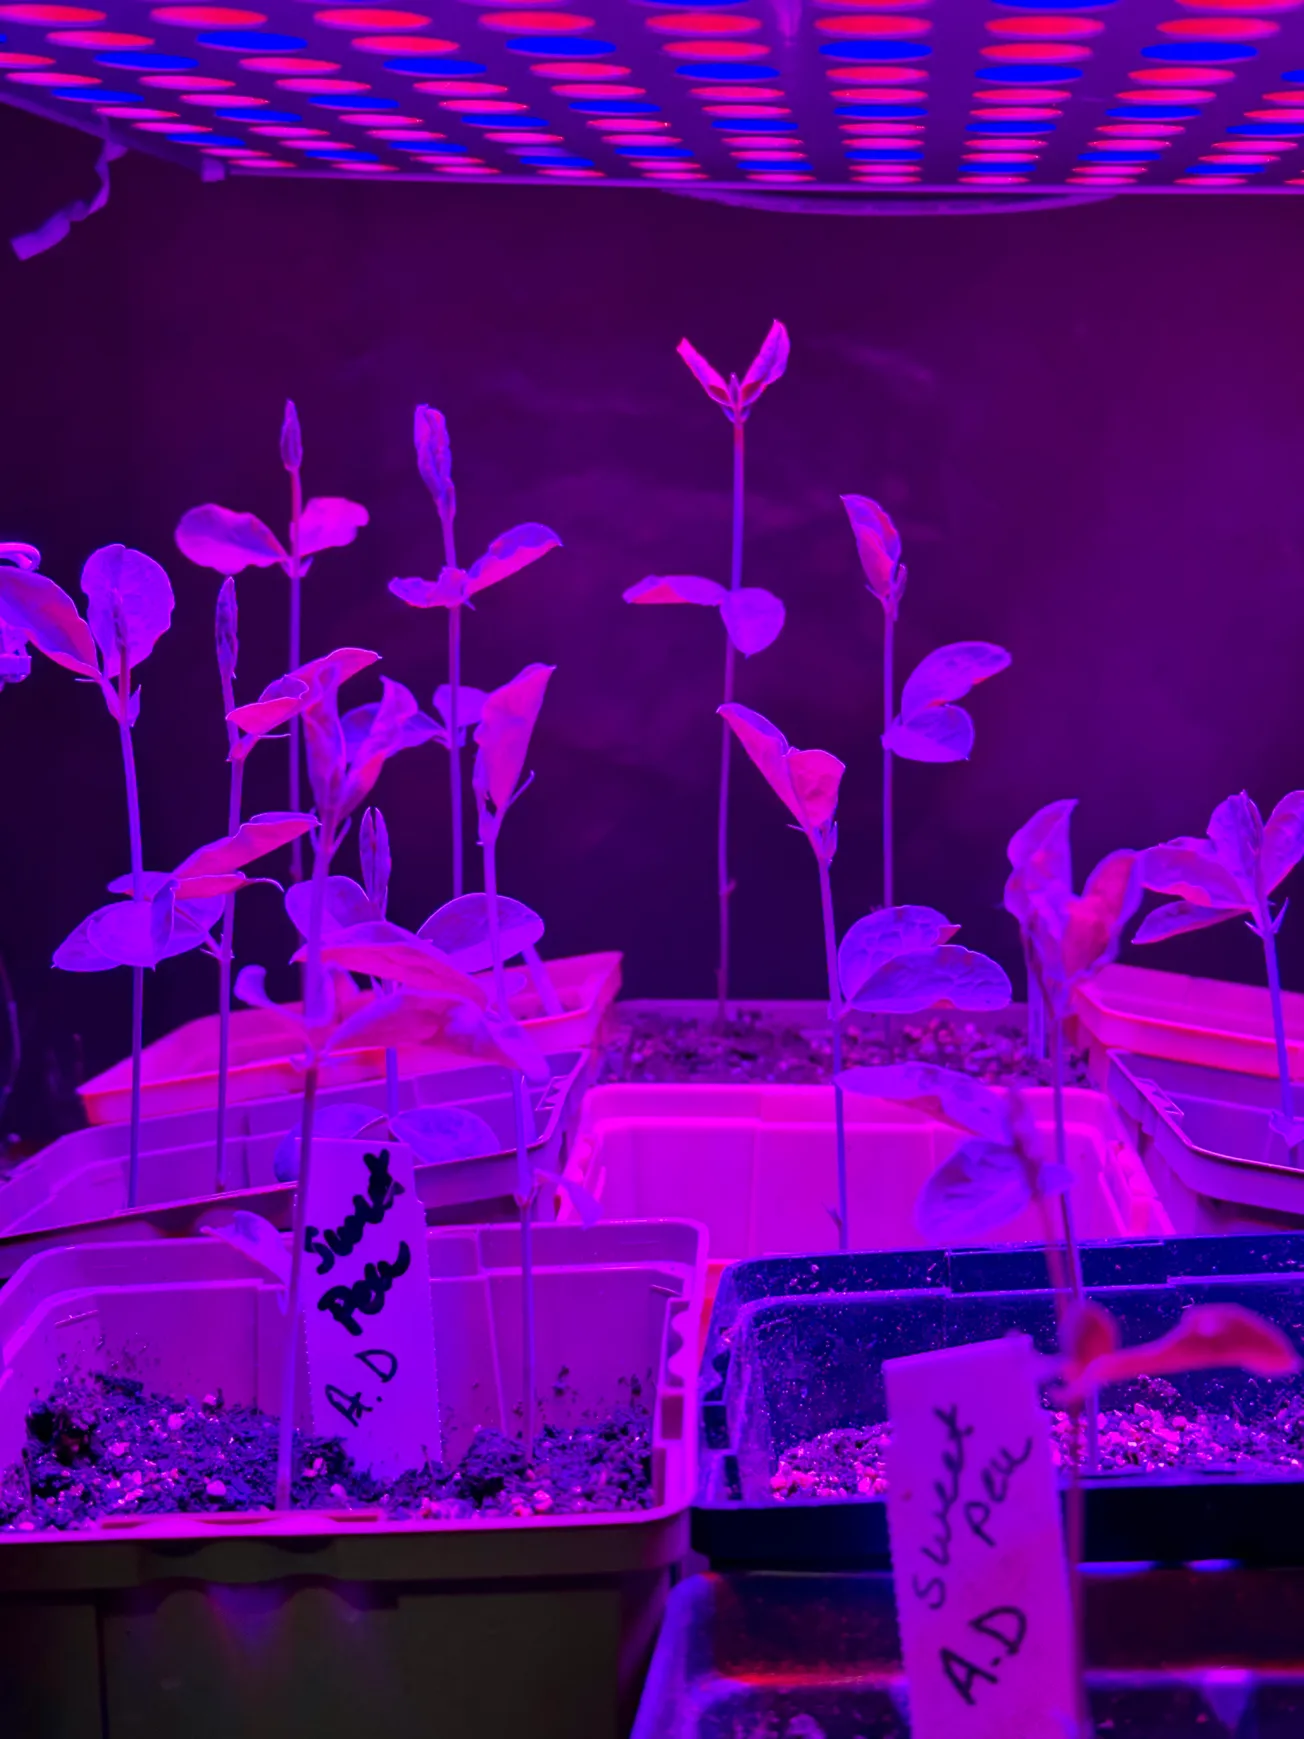
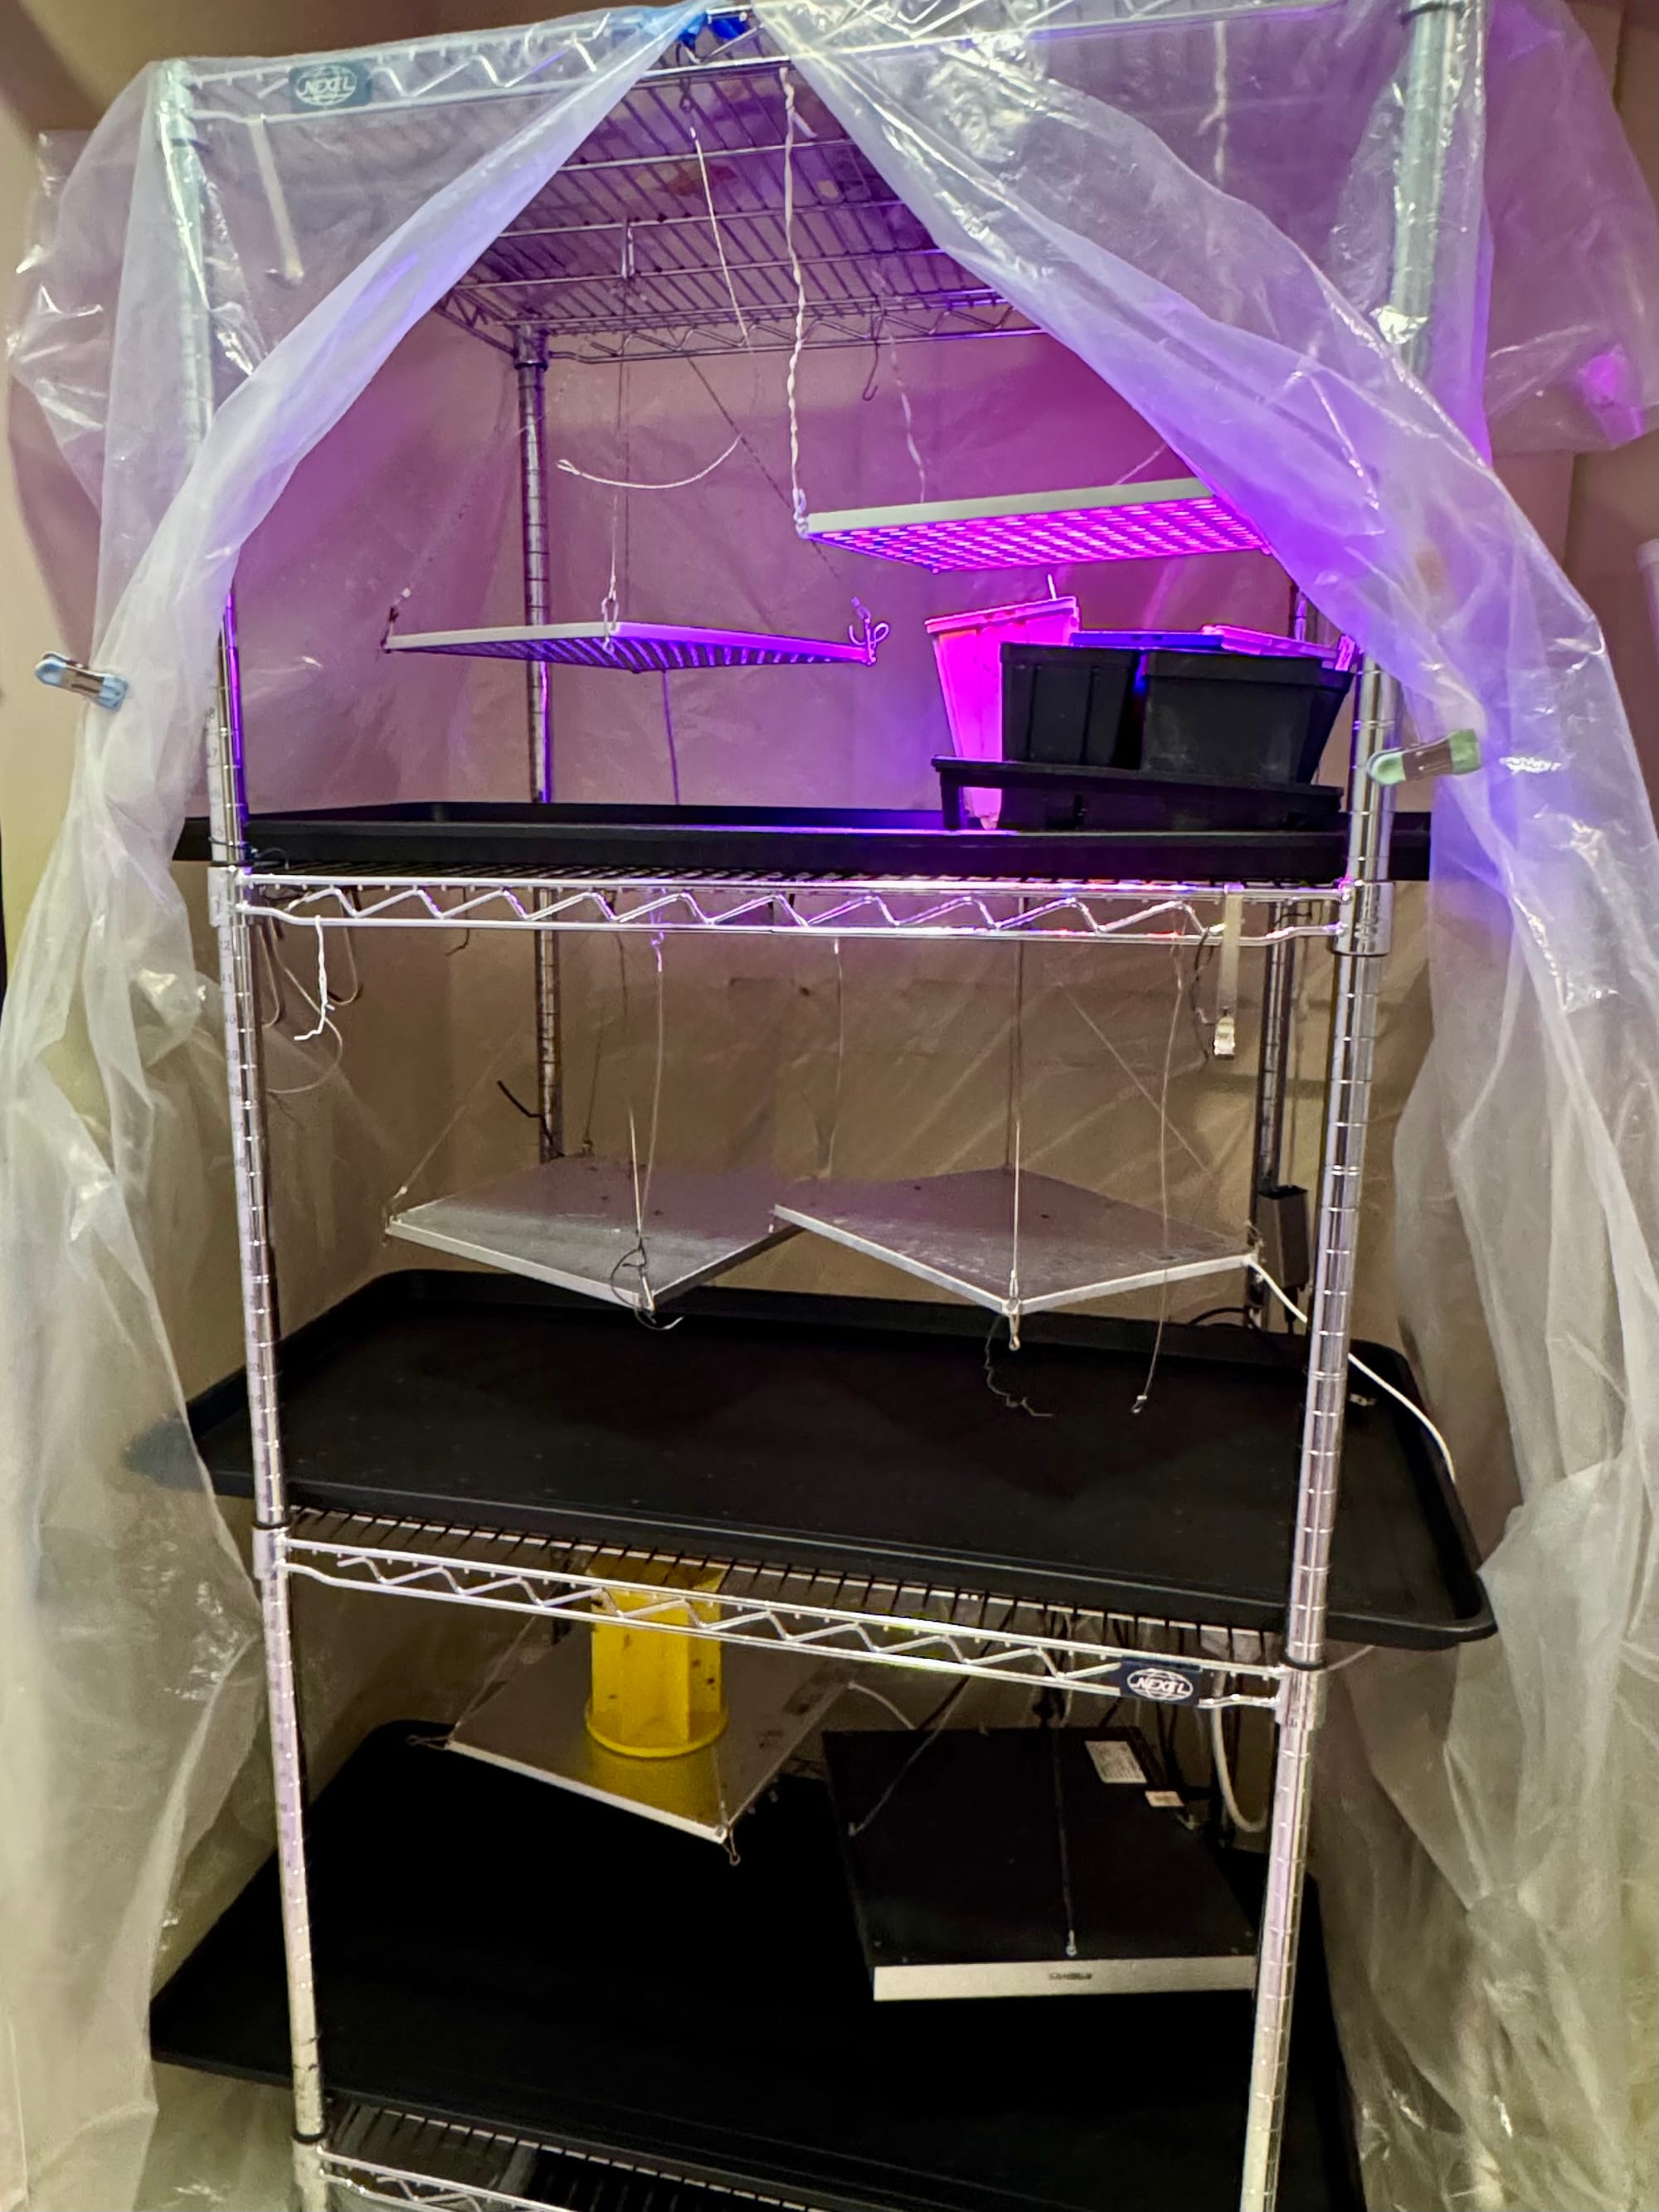
- Light Source - An artificial light source makes a big difference in seedling success. I recently added these: (https://amzn.to/3ZptTxX). These lights lasted me for ten years: (https://amzn.to/4kmkYqL). I like that they are adjustable. This photo shows my set up, which is a metal rack shelf, which works great with these lights. My husband set up timers for the lights for me. I keep lights on for 14–16 hours. (https://amzn.to/4cg5VN9). I place the timer on the outlet, then attach it to a multi-outlet extension box.

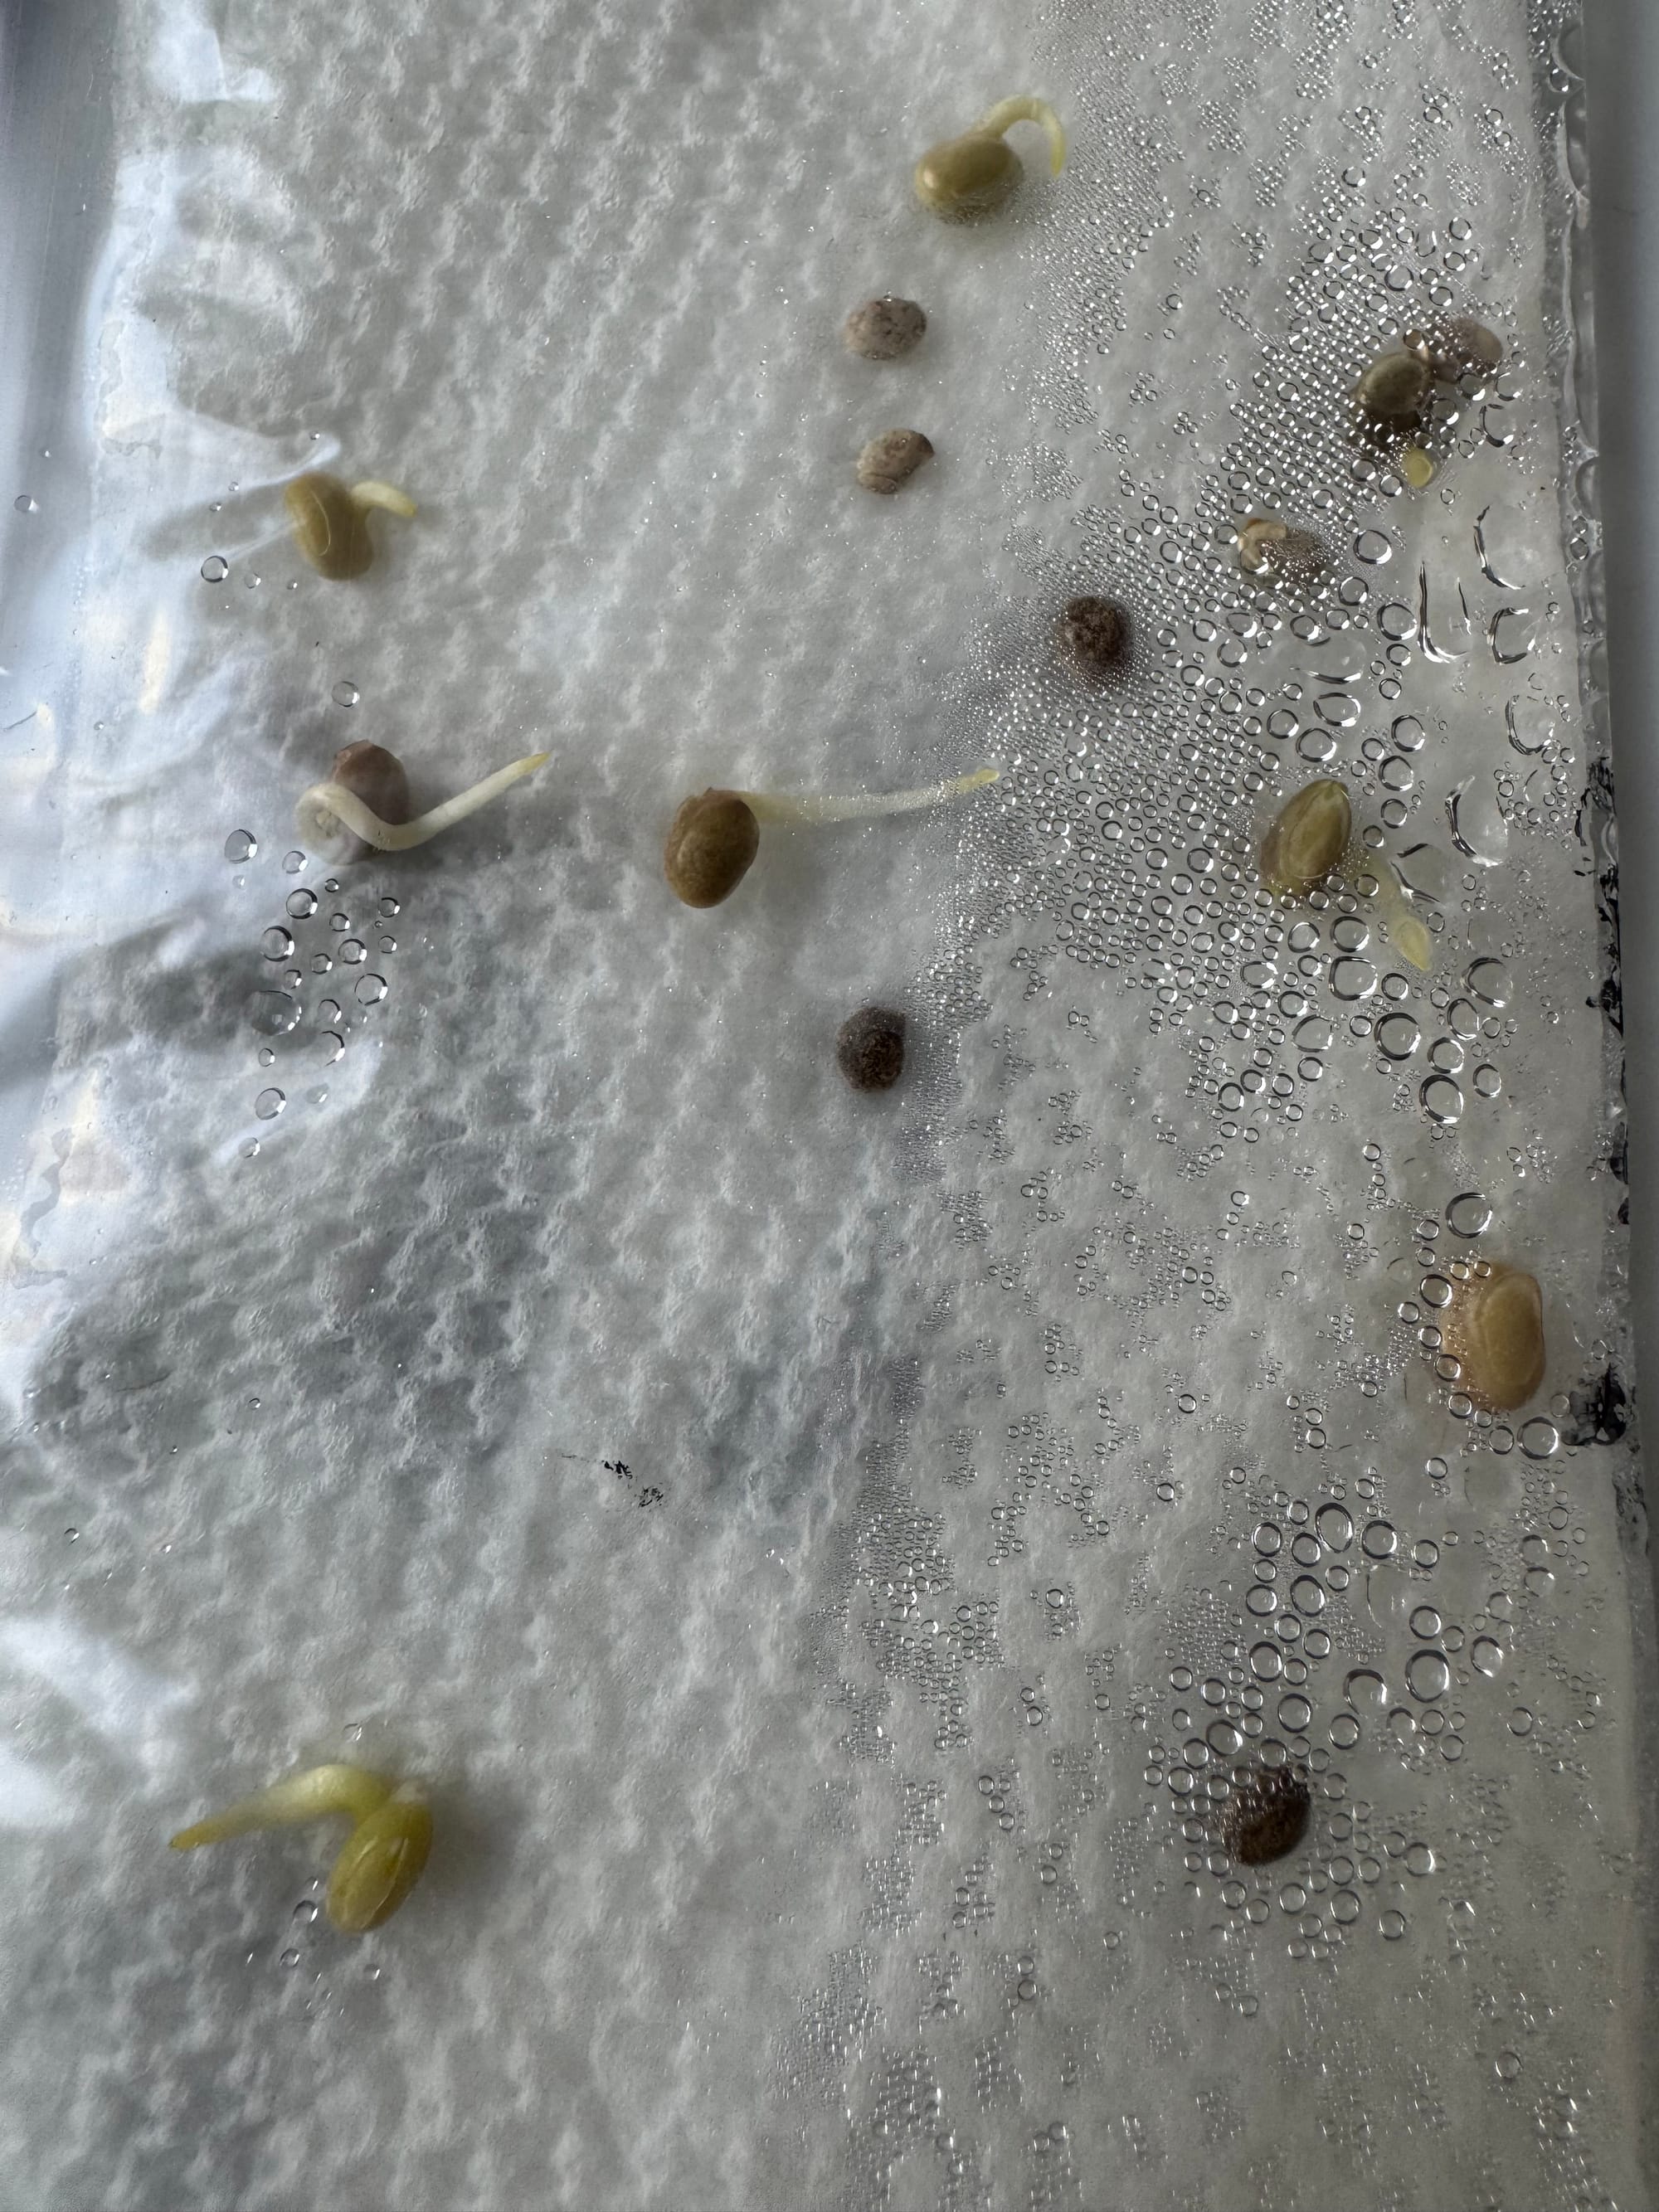
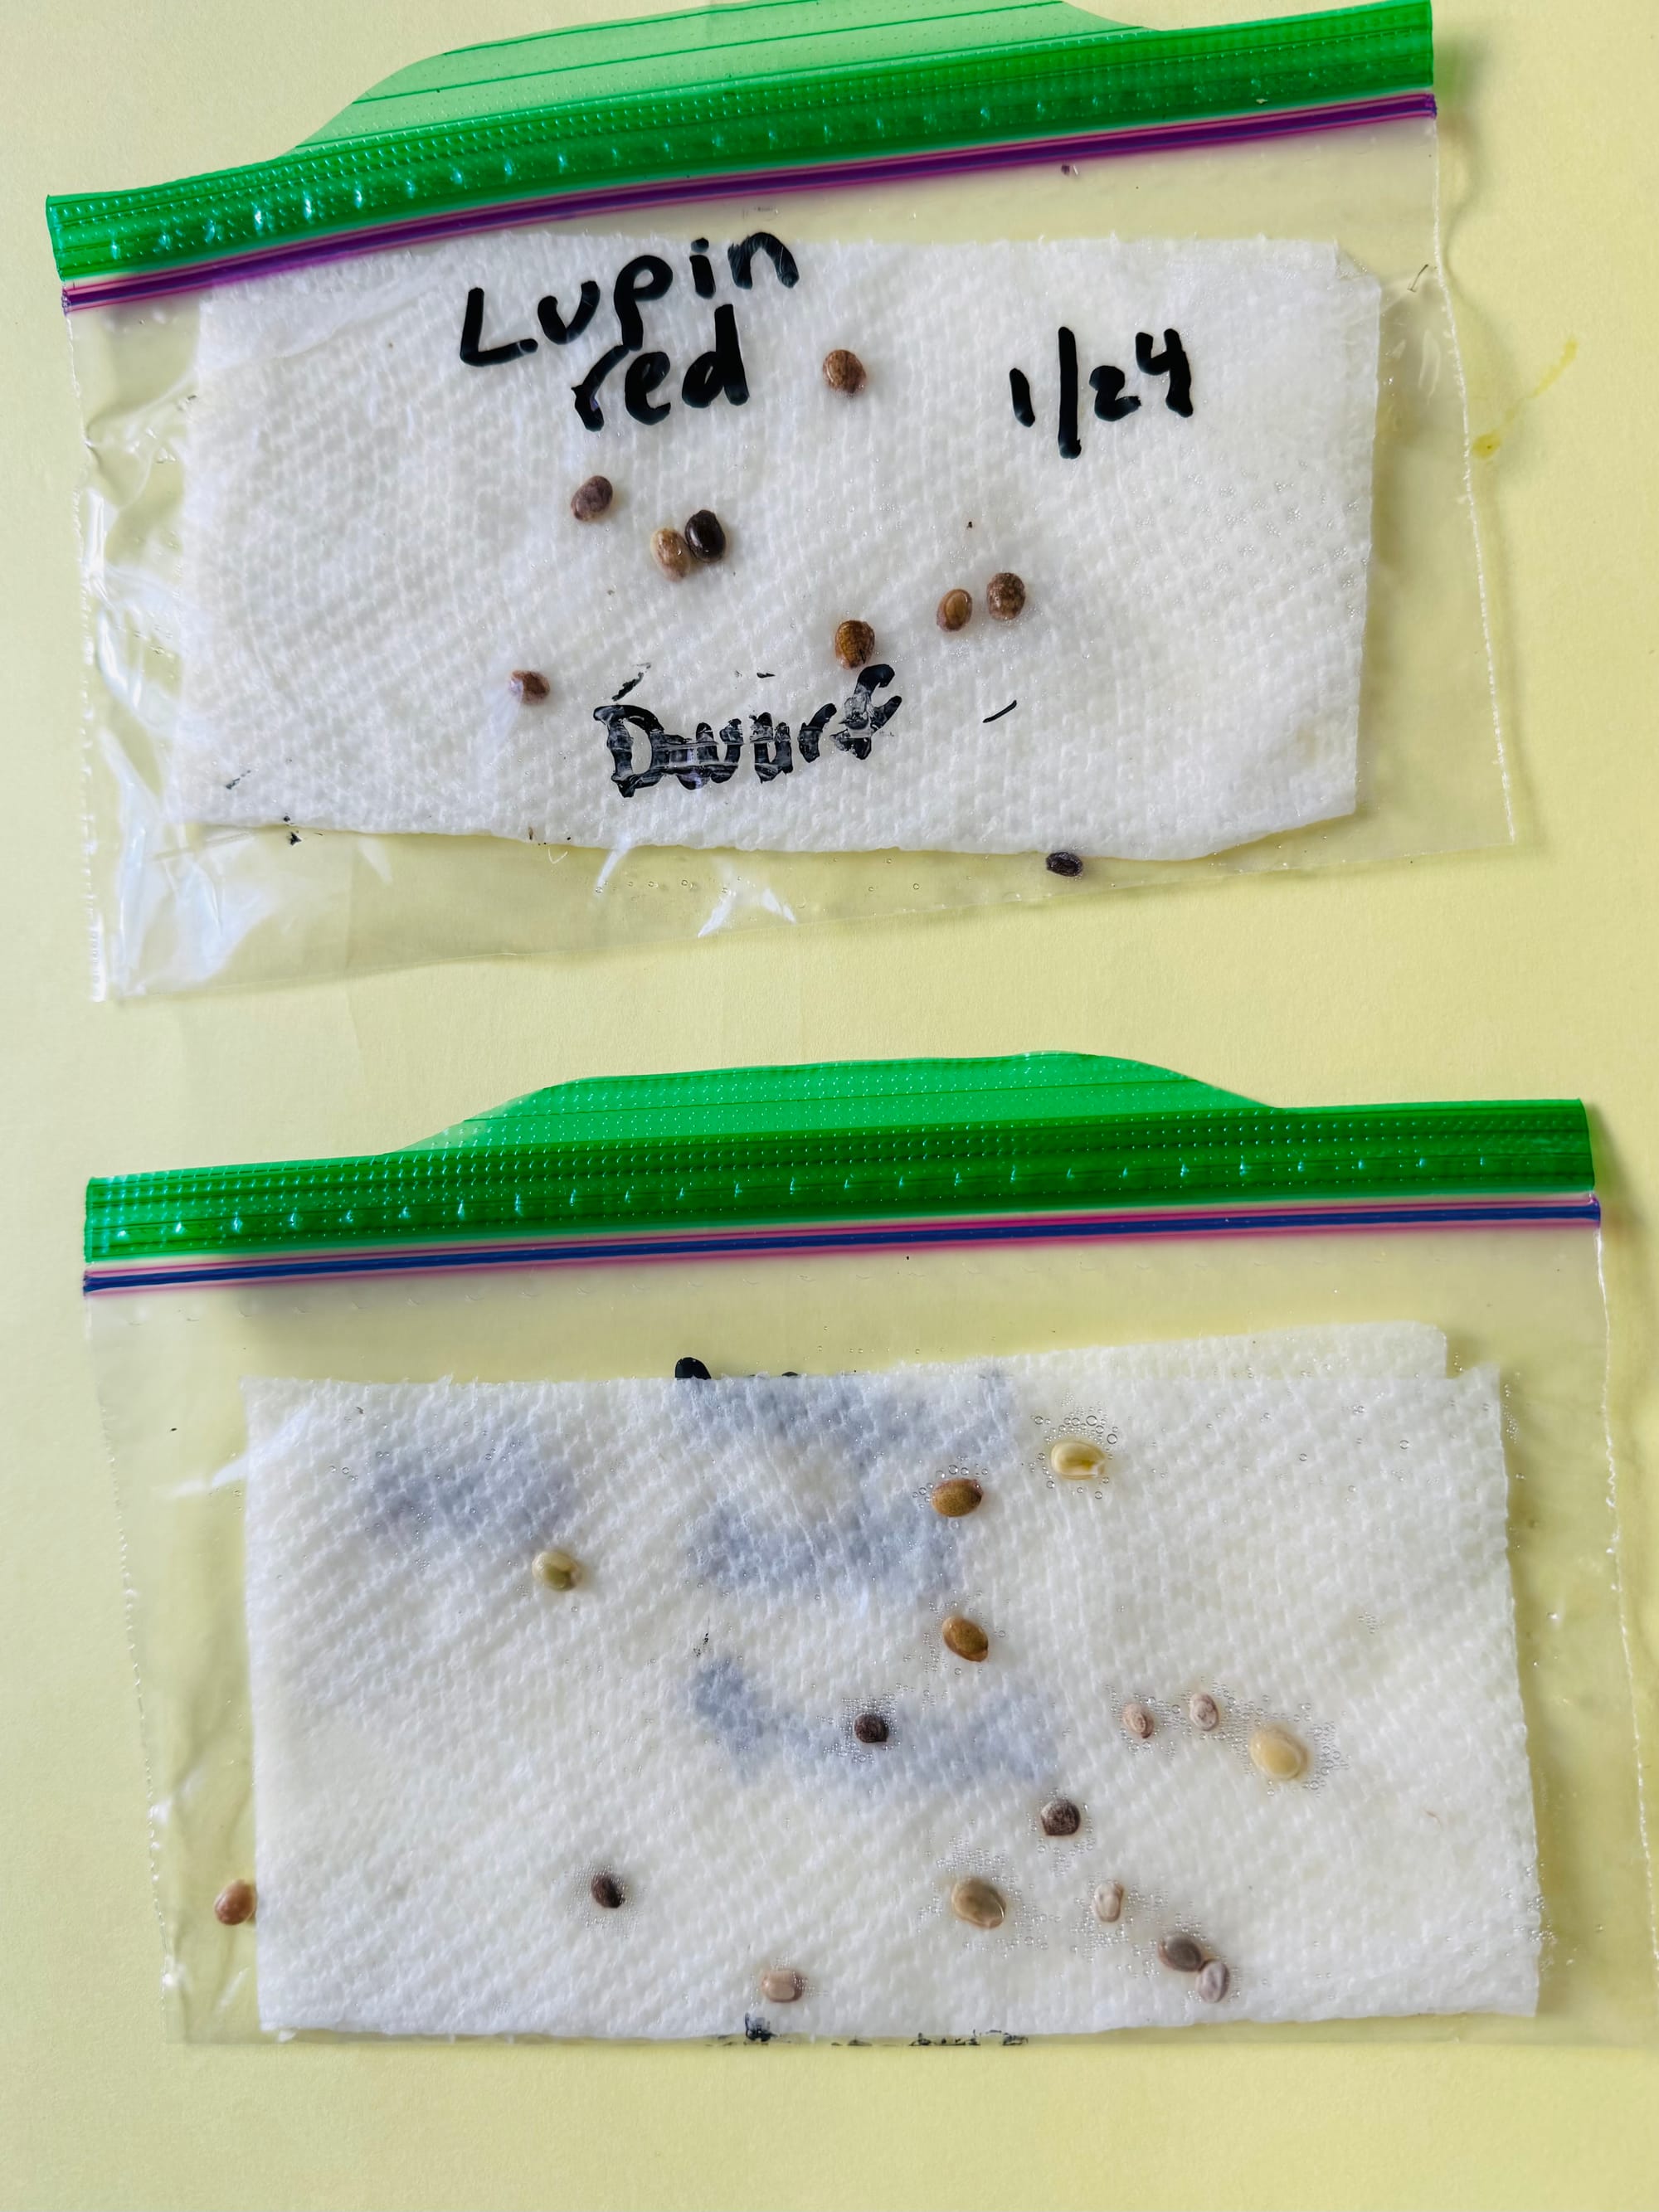
Here is the method for starting seeds that works for me. I get almost perfect germination from using the paper towel and Ziplock baggie method. (If seeds didn't succeed, it was because I got too busy organizing the Cottage Gardeners Plant Sale and forgot about them). This method is fun for kids too. It is almost instant gratification. I put seeds on a damp paper towel, in a ziplock bag. I write the date and type of seed on the baggie and zip up the baggie. Then, I put the baggie on top of the fridge or near the router or on top of a table near a heat source like a radiator. Check daily, some seeds germinate quickly. Be ready with your soil, because once the roots start, you want to plant these tiny miracles.
The roots will astound you in their ability to weave through the paper towel, they attach themselves to that Bounty paper towel like chewing gum to your child's hair. Hint: I find that it is easier to pull the tiny roots and microscopic plant off the paper towel if, in the beginning, while they are just starting off, you place the baggie upside down, so that the paper towel is on top, seeds lay on bottom. Roots have a built in mechanism to direct them downward and this way, the roots won't weave as much through the paper towel. Once seeds germinate, and roots are visible, they need to be put in moist soil.
Preparing soil and containers: I use 4" containers because I don't like to transfer seedlings into larger pots later. I used to use the much smaller ones, but did not have the patience or space to transfer each one into a new larger container. I also had very bad luck with the biodegradable containers. I place seed starter soil (mixed with vermiculite) in all containers. The vermiculite helps make the soil looser, helps with drainage and allows roots to find their way. Lower the container filled with soil into a tray of water and allow soil to soak the water up. This takes time. I usually lower an entire skeleton tray of nine or more 4" containers at the same time into a tray of water them let it sit there while I do something else.
Now for the seeds. If you used the paper towel method, make a tiny hole with a pencil, about 1"deep, into the soil and place roots into hole and gently pinch together soil around the roots, allowing the top of the seed or green baby plant to remain on top exposed. Gently water in or mist. If you are not using the paper towel baggie method, place seed on top of soil, follow directions on seed packet as to how far to place into soil, some like it on top, others need darkness. Mist and cover with a plastic cover or plastic wrap, uncover as soon as you start to see green sprouts.
Important step: sprinkle vermiculite (it is gritty) on top of soil around your new plant or seed. It helps in too many ways to explain. Ok, I will try, it keeps soil damp, makes soil inhospitable to fungus gnats and allows light to still get to tiny seeds which won't wash away with the grit there. There, I explained it.
Mistakes I have made and will continue to make: don't plant more than you can later grow. My friends have all received tomato plants and cucumber baby plants. In May, taking care of 100s of seedlings is overwhelming for any gardener to harden off.
Always try to water from below. This method cuts down on fungus gnats which seem to lay dormant in all store bought soil everywhere.
You need lights, do not skip this stem. If you just use a window, the seedlings will get leggy.
A fan is helpful once the seedlings are 6" tall. It helps to keep air circulating and I have read that it helps the tomato plants to grow stronger stems. It also discourages gnats.
Timing matters: February is a good time to start for slow growers like peppers. But don't start with fast growers like cosmos or squash until March or later or you will have very leggy plants taking over your basement like the movie Jumangi.
Count backwards from our expected last frost date (May 1). We researched and created interactive chartsof best start dates for each seed, tailored to our zone, for vegetables and for flowers.
Also, remember, gardening companies are in the business of selling you things. You don't need much to start seedlings, but you should spend your money on good soil. If a complete set-up from Gardeners Supply makes your life easier, then go for it. Now is the time you can be thrifty. Starting seeds shouldn't and doesn't have to cost you more than gas and groceries.
Once, we get to the month of May, sweet, sweet May, you will start moving these miraculous plants outside. Then you need to learn what hardening off is and you will thank me for not going over board. Hardening off is a necessary method of gradually getting your plants acclimated to the outdoor elements. For about five days, you will bring all of your plants outside to a protected area out of the sun for a few hours. I place all of mine under a table or on the shaded side of furniture. The tomatoes and cucumbers come out last, to be safe, around mid-May. They are the most tender. Watch the evening temperatures carefully before these glorious plants of yours spend the entire night out. Just imagine the tomato sandwiches you will have in July! You've got this.
ABOUT COLLEEN
Colleen has been playing in soil since her ditch days on Onondaga Hill, New York, where her parents taught her to plant and harvest vegetables on their 50-plus acres of farmland.
She is co-president of the Cottage Gardeners of Marblehead and Swampscott and helped run the club’s successful plant sale the past two years. Colleen also runs a subcommittee called D & D (dig and divide).
She is the mother of two young men — also known as root diggers and weed pullers — and adoring wife of the “amazing obelisk maker.”
Colleen likes to wear wellies year-round, eye other people’s gardens and stop at every garden center in New England. She obsesses over plants and insects and wishes she had paid more attention to science in school.


